BitesWithFamily
  • Home
  • Download
  • Social
  • Features
    • Lifestyle
    • Sports Group
      • Category 1
      • Category 2
      • Category 3
      • Category 4
      • Category 5
    • Sub Menu 3
    • Sub Menu 4
  • Contact Us

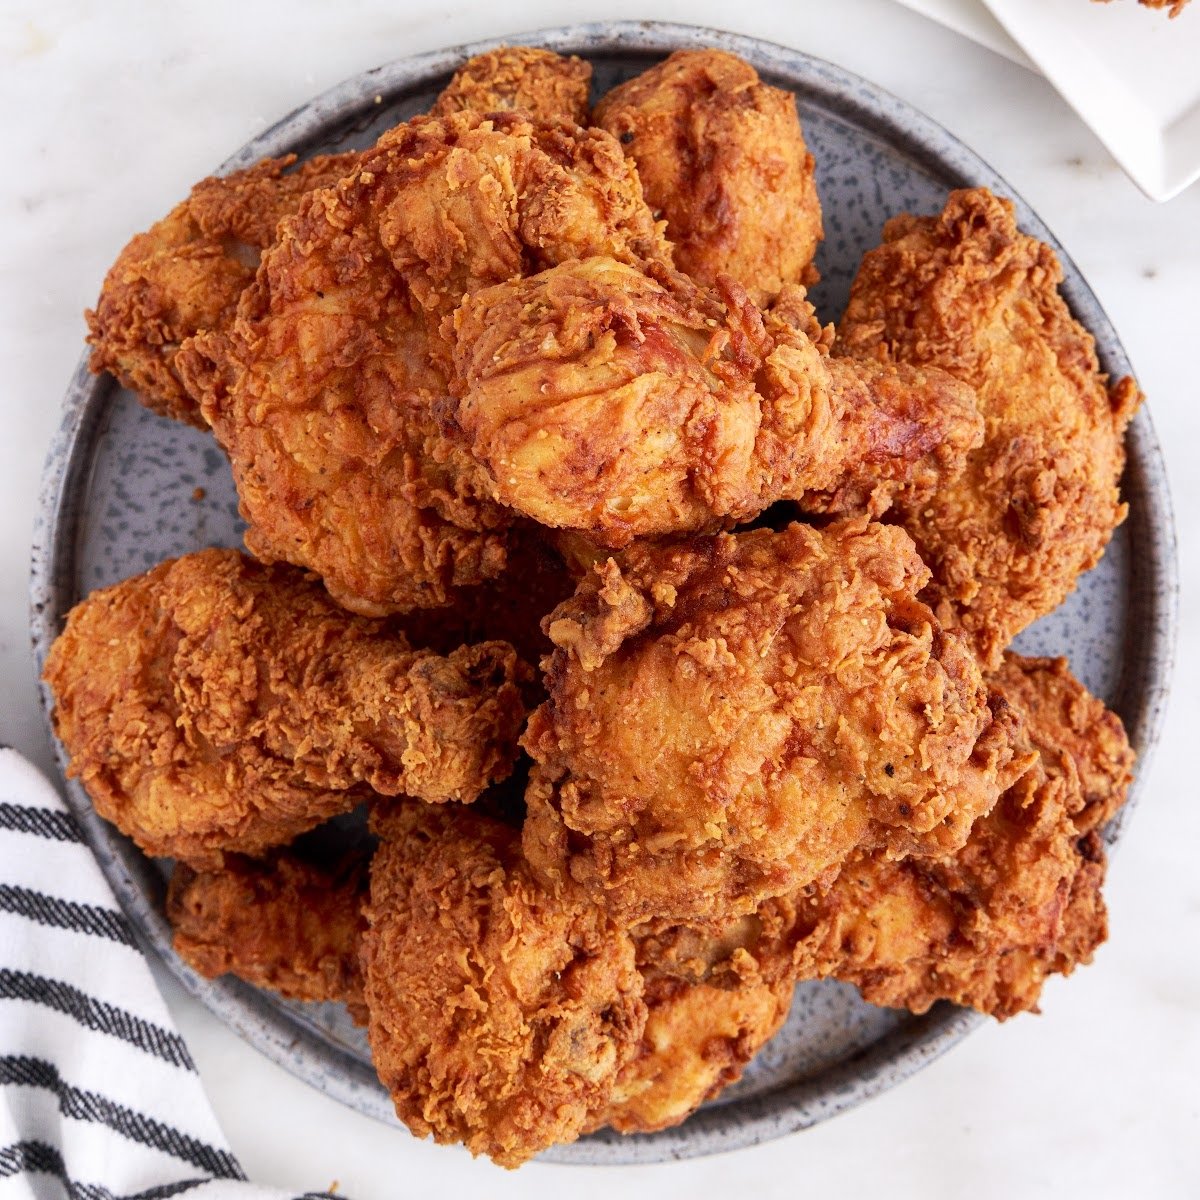
Honey Mustard Chicken Thighs Recipe

Okay, let’s cut to the chase. You’re hungry. You want something that tastes amazing, doesn't involve ten thousand ingredients, and doesn’t leave your kitchen looking like a war zone. Sound about right?

Honey Mustard Chicken Thighs

Well, honey mustard chicken thighs are here to save your dinner plans—and probably your sanity. 😅

This recipe? It’s my go-to when I want something flavorful, juicy, and just fancy enough to make me feel like I have my life together (spoiler: I usually don’t).

But hey, who needs life sorted when dinner tastes this good?

Why Honey Mustard Chicken Thighs Deserve a Spot in Your Recipe Repertoire

Let me paint you a picture. Juicy chicken thighs, caramelized edges, rich flavor from tangy mustard and sweet honey. Are you drooling yet?

Here’s why I love this recipe (and you will too):

  • Ridiculously easy – Like, “throw it in a bowl and walk away” easy.
  • Budget-friendly – Chicken thighs are cheaper than therapy. Just sayin’.
  • Flavor-packed – That perfect balance of sweet and savory? Chef’s kiss.
  • Perfect for meal prep – It reheats like a dream, and honestly tastes even better the next day.

Honestly, if you’re not making this at least once a week, what are you doing?

Ingredients: No Weird Stuff, Promise

Ever open a recipe and see something like “organic truffle-infused lemongrass oil”? Yeah… no.

Here’s what you actually need:

  • 6 bone-in, skin-on chicken thighs (you can use boneless, but trust me—bone-in = flavor)
  • 1/4 cup Dijon mustard
  • 2 tablespoons whole grain mustard (optional, but adds texture)
  • 1/4 cup honey
  • 1 tablespoon olive oil
  • 1 tablespoon apple cider vinegar (gives it that little zing)
  • 3 cloves garlic, minced (don’t skimp!)
  • 1 teaspoon smoked paprika
  • Salt & black pepper, to taste
  • Fresh rosemary or thyme (optional, but fancy)

That’s it. No mystery ingredients. No need to sell a kidney.

Step-by-Step: Let’s Make Some Magic

Step 1: Mix That Sauce

In a bowl, whisk together the Dijon mustard, honey, olive oil, vinegar, garlic, paprika, salt, and pepper. Toss in the whole grain mustard too if you’re feeling extra.

Pro tip: Taste the marinade. Too sweet? Add more mustard. Too sharp? A little extra honey. You’re the boss here.

Step 2: Coat the Chicken Like You Mean It

Place your chicken thighs in a large Ziploc bag or bowl. Pour the marinade all over and massage it into every nook and cranny. Get in there.

Let it sit in the fridge for at least 30 minutes, or even better—overnight. (You know, if you're the type who plans meals more than 5 minutes in advance. I salute you.)

Step 3: Oven Time 🔥

Preheat your oven to 400°F (200°C).

Line a baking sheet with foil or parchment (because scrubbing pans is not the vibe), and lay out your chicken thighs skin-side up.

Optional but recommended: Spoon a little extra marinade over the top for more flavor punch.

Bake for 35–45 minutes, or until the skin is golden and crispy and the juices run clear.

FYI, if you want that skin extra crispy (who doesn’t?), switch to broil for the last 2–3 minutes. Just keep an eye on it unless you enjoy dinner emergencies.

What to Serve with Honey Mustard Chicken Thighs

Let’s talk sides. Because as great as chicken is, it’s even better with friends (ahem, carbs).

🥔 Roasted Potatoes

Chunky, crispy, herby potatoes are basically chicken’s BFF. Toss them with olive oil, garlic, and rosemary—chef mode activated.

🥦 Steamed or Roasted Veggies

Broccoli, green beans, or even Brussels sprouts. Yeah, I said it. Honey mustard makes veggies taste like less of a chore.

🍚 Rice or Quinoa

Perfect for soaking up that extra sauce. Because wasting that liquid gold should be illegal.

Tips & Tricks for the Best Chicken Thighs Ever

Want to level up? Here are some pro tips I’ve learned (sometimes the hard way):

  • Use a meat thermometer. Chicken thighs should hit 165°F (74°C) internally. No guessing, no salmonella.
  • Don’t crowd the pan. Give your thighs room to breathe or they’ll steam instead of crisp.
  • Let it rest. I know, I know—you want to eat immediately. But give the chicken 5 minutes before digging in. It keeps all the juice inside where it belongs.
  • Double the marinade. Save half for drizzling after cooking. Just don’t reuse the stuff that touched raw chicken. You don’t want that kind of chaos.

Variations: Because Boredom Is Not on the Menu

Feeling adventurous (or just missing a few ingredients)? No biggie.

🍋 Lemon Honey Mustard Chicken

Add lemon zest and a squeeze of juice to the marinade. Brightens everything up like a summer day.

🔥 Spicy Honey Mustard Chicken

Stir in some sriracha, chili flakes, or a splash of hot sauce. Because life’s too short for bland food.

🍷 Fancy Wine Version

Swap the vinegar for white wine, and throw in some fresh thyme. Instant gourmet vibes, minimal effort.

Meal Prep Goals: Leftovers You’ll Actually Crave

Not gonna lie—this chicken tastes even better the next day. The flavors really settle in and get comfy.

Here’s how I like to use leftovers:

  • Slice over a salad with arugula, goat cheese, and balsamic drizzle.
  • Shred into sandwiches with extra mustard and crunchy pickles.
  • Toss into pasta with a little cream or even just butter and garlic.

And yes, cold straight-from-the-fridge bites at 2 a.m. also count. No judgment here.

Common Questions (a.k.a. Stuff My Friends Always Ask Me)

“Can I use chicken breasts instead?”

Technically yes. But honestly? Chicken thighs win every time. They’re juicier, more flavorful, and harder to screw up. Breasts tend to dry out unless you babysit them.

“Is this freezer-friendly?”

Totally. Just freeze the marinated raw chicken in a Ziploc bag. Then thaw and bake when you’re ready to rock.

“What’s the best mustard to use?”

Dijon is your best bet. Avoid yellow mustard unless you want it to taste like a hot dog (no offense, hot dogs).

Final Thoughts: Make This Once and You’ll Never Go Back

So there you have it—the honey mustard chicken thighs recipe that never fails. It’s quick, simple, and makes you look like you know what you’re doing (even if you don’t).

Whether you’re cooking for your family, your partner, or just treating yourself to something better than cereal—this one’s a winner.

And hey, if you make this and don’t immediately want to lick the pan… we might need to talk. 😉

Now get in that kitchen and show those chicken thighs who’s boss.

P.S. Don’t forget to share your creation with your group chat. Bonus points if you make it look all fancy with a sprig of rosemary. #ChefVibes

Honey Mustard Chicken Thighs

⏱️ Prep Time: 10 min
🔥 Cook Time: 40 min
🍽️ Serves: 4–6
⏰ Total Time: 50 min
🔥 Calories: ~400

🥘 Ingredients:

  • 6 bone-in, skin-on chicken thighs
  • 1/4 cup Dijon mustard
  • 2 tbsp whole grain mustard (optional)
  • 1/4 cup honey
  • 1 tbsp olive oil
  • 1 tbsp apple cider vinegar
  • 3 cloves garlic, minced
  • 1 tsp smoked paprika
  • Salt & black pepper, to taste
  • Fresh rosemary or thyme (optional)

👩‍🍳 Instructions:

  1. Mix all marinade ingredients in a bowl.
  2. Coat chicken thighs thoroughly and refrigerate for 30 mins (or overnight).
  3. Preheat oven to 400°F (200°C).
  4. Place chicken on lined baking sheet, skin-side up. Bake 35–45 mins.
  5. Broil last 2–3 mins for crispier skin. Let rest 5 mins before serving.

📦 Storage Tips:

  • Store leftovers in the fridge for up to 4 days.
  • Freeze marinated raw chicken for later use.

✨ Notes:

  • Use a meat thermometer for perfect doneness (165°F).
  • Don't overcrowd the pan or the skin won’t crisp.
  • Leftovers make killer sandwiches and salads. Just sayin’.

Chicken Fricassée Recipe

Alright, let’s be real for a second: Chicken Fricassée sounds fancy, right? Like something you'd only order at a French restaurant where everyone’s pretending they know what “fricassée” means. (Spoiler alert: it’s just a braised chicken stew with a creamy, dreamy sauce—basically cozy food in a beret.)

Chicken Fricassée

If you’re here, you probably want to know how to make it without feeling like you need a culinary degree or a tiny mustache. Good news: I’ve got you.

This recipe is easy, rich, and ridiculously satisfying. It’s the kind of dish that makes people think you tried way harder than you actually did. 😎 And isn’t that the dream?

What Exactly Is Chicken Fricassée?

So here’s the tea: Chicken Fricassée is a classic French dish where you brown chicken, then cook it low and slow in a velvety white sauce made with wine, stock, and usually a splash of cream or crème fraîche (because of course).

Think of it as a hybrid between a stew and a sauce. Not quite soup, not quite roast—just pure comfort food magic.

Why Is This Dish So Underrated?

I’ll say it—Chicken Fricassée is criminally underrated. Maybe because the name intimidates people, or maybe because everyone’s still out here roasting chicken or making another round of boring casseroles.

But this one? It’s rich, it’s creamy, and it makes your kitchen smell like you actually know what you’re doing. Even if you’re just winging it.

Ingredients You’ll Need (Nothing Weird, Promise)

Here’s the beauty of this dish: it doesn’t require a trip to a specialty store or a second mortgage.

Core Ingredients:

  • 4–6 bone-in, skin-on chicken thighs (because flavor, duh)
  • 2 tbsp butter (unsalted, so you control the salt game)
  • 1 tbsp olive oil
  • 1 small onion, finely chopped
  • 2 cloves garlic, minced
  • 1 carrot, diced
  • 1 celery stalk, diced
  • 1/2 cup dry white wine (nothing too sweet—Pinot Grigio works!)
  • 2 cups chicken stock
  • 1 bay leaf
  • 1 tsp fresh thyme (or 1/2 tsp dried)
  • 1/2 cup heavy cream or crème fraîche
  • Salt and black pepper, to taste
  • Fresh parsley, for garnish (optional)

Optional (But Tasty) Add-Ins:

  • Mushrooms – Add 1 cup sliced if you like that earthy flavor
  • Lemon juice – Just a squeeze at the end to brighten it all up
  • Flour – 1 tbsp if you want a thicker sauce

How to Make Chicken Fricassée (Without Stressing Out)

Step 1: Brown That Chicken

Pat the chicken thighs dry. (This helps them brown better, not just because the chicken likes towels.)

  • Heat butter and olive oil in a large skillet or Dutch oven over medium-high heat.
  • Add chicken skin-side down, and let them brown for about 4–5 minutes per side.
  • Remove and set aside. (They’re not cooked through yet—don’t panic.)

Step 2: Sauté the Aromatics

Now toss in your onions, carrots, and celery (the holy trinity of “making stuff taste like you know what you’re doing”).

  • Sauté for 5–6 minutes until soft.
  • Add garlic and stir for another 30 seconds (don’t let it burn or we riot).

Step 3: Deglaze and Simmer

  • Pour in the wine and scrape up the golden brown bits on the bottom. That’s flavor, baby.
  • Let the wine simmer for 2–3 minutes until it reduces slightly.
  • Add chicken stock, bay leaf, thyme, and bring everything to a simmer.
  • Nestle the chicken back in, skin-side up.

Cover, reduce the heat, and let it simmer gently for 30–35 minutes.

Step 4: Finish with Creamy Goodness

  • Take the lid off and remove the chicken temporarily.
  • Stir in your cream or crème fraîche.
  • Add mushrooms now if using (they only need 5–10 minutes to soften).
  • Taste and adjust seasoning (FYI, salt is your friend here).
  • Slide the chicken back in, spoon the sauce over it, and cook for 5 more minutes uncovered so everything gets cozy.

Step 5: Serve and Flex

Garnish with fresh parsley (or don’t, I’m not judging) and serve over:

  • Mashed potatoes (a no-brainer)
  • Rice (soaks up the sauce perfectly)
  • Buttered noodles (because carbs are life)

Why You’ll Fall in Love with This Dish

Aside from the obvious (buttery chicken + creamy sauce = joy), this dish checks all the right boxes:

  • One-pot wonder – Less mess, less cleanup, more wine for you.
  • Impressive without being hard – Great for date night or showing off to your in-laws.
  • Customizable – Hate mushrooms? Leave ’em out. Want more garlic? Go wild.

Ever wondered why some dishes feel like a hug in a bowl? This is one of those. ❤️

Common Questions

Can I use boneless chicken?

You can, but IMO you’ll miss out on some of the rich flavor that bone-in brings to the party. Boneless thighs work better than breasts though—they stay juicy and soak up the sauce like pros.

Can I make this ahead of time?

Absolutely! It actually tastes better the next day. Just reheat it gently on the stove and maybe add a splash of broth or cream to loosen the sauce.

Is there a dairy-free version?

Yep. Use olive oil instead of butter and swap out the cream for coconut milk or a non-dairy cream substitute. It changes the flavor a bit, but it still slaps.

Tips for Next-Level Chicken Fricassée

Because if you’re going to do it, do it well, right?

  • Sear the chicken properly – Don’t rush it. You want that golden-brown crust.
  • Use wine you’d actually drink – Cooking wine is a scam. Don’t fall for it.
  • Let the sauce simmer low and slow – It deepens the flavor and turns you into a kitchen wizard.
  • Taste and adjust – Seriously, trust your tastebuds more. Recipes are suggestions, not commandments.

Wanna Get Fancy? Try These Variations

  • Add pearl onions and peas for a springy twist.
  • Swap the chicken for turkey thighs (surprisingly awesome).
  • Top with a poached egg and eat it over toast for brunch (yes, this is real, and yes, it’s amazing).

Final Thoughts

So, what did we learn today? Other than the fact that French cooking doesn’t have to be snobby or stressful?

Chicken Fricassée is a total sleeper hit. It’s comforting, it’s flavorful, and it makes you feel like you’ve got your life together—even if your idea of meal planning is choosing between cereal or frozen pizza most nights. (Been there.)

If you’ve made it this far, I’ll take that as a sign you’re about to try this. And trust me—your future self (and your tastebuds) will thank you.

So go grab that skillet, pour yourself a glass of wine (you know, for the recipe), and get cooking. 🧑‍🍳🍗

And hey—tag me if you try it, or just tell me how much better it turned out than you expected. I won’t say “I told you so”… but like, I did ;)

TL;DR (Too Lazy? No Judgement):

  • Chicken Fricassée = creamy, dreamy French chicken stew
  • Easy AF to make at home
  • One pot, customizable, and tastes fancy without being fussy
  • Serve it with mashed potatoes, rice, or noodles
  • Try it once—you’ll crave it forever

Now go get your fricassée on! 💪

Chicken Fricassée

⏱️ Prep Time: 15 min
🔥 Cook Time: 45 min
🍽️ Serves: 4
⏰ Total Time: 1 hr
🔥 Calories: ~500 per serving

🥘 Ingredients:

  • 4–6 bone-in, skin-on chicken thighs
  • 2 tbsp butter
  • 1 tbsp olive oil
  • 1 small onion, chopped
  • 2 cloves garlic, minced
  • 1 carrot, diced
  • 1 celery stalk, diced
  • 1/2 cup dry white wine
  • 2 cups chicken stock
  • 1 bay leaf
  • 1 tsp thyme
  • 1/2 cup heavy cream or crème fraîche
  • Salt & pepper, to taste
  • Optional: Mushrooms, lemon juice, flour for thickening

👩‍🍳 Instructions:

  1. Brown chicken in butter and olive oil; set aside.
  2. Sauté onion, carrot, celery; add garlic last.
  3. Deglaze with wine; add stock, herbs, and chicken.
  4. Simmer covered 30–35 minutes.
  5. Remove chicken, stir in cream and optional ingredients.
  6. Return chicken, simmer 5 more minutes. Serve hot!

📦 Storage Tips:

  • Refrigerate leftovers up to 3 days.
  • Freeze up to 2 months. Reheat with extra broth or cream.

✨ Notes:

  • Use bone-in chicken for max flavor.
  • White wine adds depth—don’t skip it if you can help it.
  • Goes great over mashed potatoes, rice, or noodles.

Homemade Blueberry Pie Recipe 🍇 (That Doesn’t Suck)

Let’s be real—there’s nothing like a warm slice of homemade blueberry pie. Flaky crust, gooey filling, a scoop of vanilla ice cream melting on top... I mean, come on. You can keep your fancy desserts; I’ll take this humble, juicy masterpiece any day.

Homemade Blueberry Pie

Now, if you’ve ever tried making a pie from scratch and ended up with a soggy-bottomed crime scene, you’re not alone. Been there, done that. I’ve cried over crust. But don’t worry—I’ve got you. This isn’t just a “follow the recipe and pray” situation. This is a battle-tested, friend-approved guide to making a legit homemade blueberry pie that’ll have people thinking you secretly went to culinary school.

Ready? Let’s do this.

Why Homemade Blueberry Pie Is Worth the Effort

Okay, so you’re wondering: why make it from scratch when I can just grab a pie at the store? Totally fair question.

Let me break it down:

  • Store-bought pie = sugar bomb with cardboard crust (no offense, but… yeah).
  • Homemade pie = fresh, juicy berries + buttery, flaky crust + bragging rights.
  • Bonus: Your kitchen will smell amazing. Like, “I-should-open-a-bakery” amazing.

And FYI, making your own isn’t as scary as it sounds. Once you’ve done it once, you’ll wonder what all the fuss was about.

What You’ll Need (Spoiler: Not a Degree in Baking)

Let’s keep it simple. Here's your lineup:

Ingredients for the Filling

  • 5 cups of fresh or frozen blueberries (fresh = best, but frozen gets the job done)
  • 3/4 cup granulated sugar
  • 1/4 cup cornstarch (keeps things thick and luscious)
  • 1 tbsp lemon juice (brightens the flavor)
  • 1/2 tsp ground cinnamon
  • Pinch of salt
  • 1 tbsp butter, cut into small bits (because duh—always butter)

For the Crust (aka the MVP)

If you’re down to make it from scratch (you should be), you’ll need:

  • 2 1/2 cups all-purpose flour
  • 1 cup (2 sticks) unsalted butter, cold and cubed
  • 1 tsp salt
  • 1 tsp sugar
  • 6-8 tbsp ice water

Or hey, grab pre-made crust if you’re in a rush. I won’t judge. (Well… maybe just a little 😏.)

Step-by-Step: How to Make Homemade Blueberry Pie

1. Make the Crust (Don’t Panic)

This part freaks people out. But if you can smash butter into flour, you can make pie crust.

  • In a large bowl, mix flour, salt, and sugar.
  • Cut in the butter using a pastry cutter or your fingers until it looks like coarse crumbs.
  • Add ice water, 1 tbsp at a time, until dough comes together.
  • Divide into two disks, wrap in plastic wrap, and chill for at least an hour.

Pro tip: Cold dough = flaky crust. Warm dough = sadness and regret.

2. Prep the Filling

While your dough chills, toss your blueberries with sugar, cornstarch, lemon juice, cinnamon, and a pinch of salt. Let it sit while you roll out the crust. The filling will thicken a bit and make your berries taste like actual candy.

3. Roll Out the Dough

Here comes the fun (and slightly nerve-wracking) part.

  • Flour your surface, and roll out one dough disk into a 12-inch circle.
  • Place it in your pie dish, press it gently into the bottom, and trim the edges.
  • Pour in the blueberry filling.
  • Dot with butter bits (this adds flavor and shine—thank me later).

4. Top It Like a Pro

You’ve got options here:

  • Lattice top: Looks fancy, isn’t hard. Just slice strips and crisscross ‘em.
  • Full top: Roll out the second dough disk, plop it on top, and cut a few slits.
  • Rustic galette-style: Fold edges over the filling and call it a day. Boom—rustic charm.

Brush the top with an egg wash (1 beaten egg + splash of milk) for that golden-brown bakery look. Sprinkle with sugar if you’re feeling extra.

5. Bake It!

  • Preheat oven to 400°F (200°C).
  • Bake the pie for 20 minutes at 400°F, then lower to 350°F (175°C) and bake another 35-40 minutes.

You’re aiming for bubbly filling and golden crust. If the crust gets too brown, cover the edges with foil (aka the crust shield hack).

6. Cool Before Cutting (I Know, I Know)

This part’s brutal, but if you cut the pie right away, you’ll end up with a blueberry soup puddle. Let it cool for at least 2 hours.

Want it warm? Microwave your slice. Easy fix.

Common Blueberry Pie Mistakes (And How to Avoid Them)

Let’s keep it real—I’ve messed up more pies than I care to admit. So here’s what I’ve learned:

Mistake #1: Runny Filling

Solution: Don’t skip the cornstarch. And definitely let the pie cool before cutting.

Mistake #2: Soggy Bottom Crust

Ugh. The worst.

Fix it:

  • Pre-bake the bottom crust for 10 minutes (if you’re extra cautious).
  • Or put a baking sheet in the oven to heat up and place your pie pan on that.

Mistake #3: Undercooked Berries

No one wants chewy blueberries.

Tip: Bake long enough that the filling bubbles—this activates the cornstarch and fully cooks the fruit.

Pie Crust Tips That Actually Work

Let’s talk crust real quick. Because a good crust can make or break your pie.

  • Use cold butter. Like, fridge-cold. Don’t mess with room temp.
  • Don’t overwork the dough. A few lumps of butter = flaky perfection.
  • Chill it twice: Once after mixing, and again after rolling it out. This helps it hold its shape.
  • Roll gently. If you smash it, it’ll toughen up. And nobody wants a tough crust.

Can I Use Frozen Blueberries?

Short answer: Yes.

Longer answer: Drain them first, or you’ll have a watery mess. I like to let mine thaw in a colander for about 30 minutes, then pat dry with paper towels.

Frozen berries are a little less sweet too, so maybe bump up the sugar just a smidge.

Add a Little Something-Something

Wanna jazz up your pie? Here are a few fun tweaks:

  • Add a splash of vanilla or almond extract to the filling.
  • Toss in a handful of raspberries or blackberries for a flavor mix.
  • Use brown sugar instead of white for a deeper, caramel-y vibe.
  • Serve with ice cream (obviously).

Ever tried it with a lemon zest whip cream? Game-changer.

Storage Tips (If You Somehow Have Leftovers)

Honestly, leftover pie is a rare sight in my house, but if you manage it:

  • Store at room temp (covered) for up to 2 days.
  • In the fridge? Good for about 4-5 days.
  • Freeze slices if you’re feeling super organized (wrap well, obviously).

Reheat in the oven for the best texture. Microwaves work, but you’ll sacrifice crispiness. And we don’t do soggy crust around here.

Final Thoughts:

Let’s wrap this up.

Homemade blueberry pie isn’t hard—it just sounds fancy. If you’ve got berries, butter, and a little patience, you’re already halfway there. And trust me, there’s nothing like pulling that golden beauty out of the oven and knowing you made it yourself.

So the next time someone suggests grabbing dessert from the store? Just smile and say, “Nah, I’ve got this.” Then drop that pie on the table like a boss. 😎

Now go make some pie. And save me a slice, yeah?

Homemade Blueberry Pie

⏱️ Prep Time: 30 min
🔥 Cook Time: 60 min
🍽️ Serves: 8
⏰ Total Time: 2 hrs (including chilling/cooling)
🔥 Calories: ~400 per slice (just eat it)

🥘 Ingredients:

  • 5 cups fresh or frozen blueberries
  • 3/4 cup granulated sugar
  • 1/4 cup cornstarch
  • 1 tbsp lemon juice
  • 1/2 tsp ground cinnamon
  • Pinch of salt
  • 1 tbsp butter, cubed
  • 2 1/2 cups flour
  • 1 cup unsalted butter, cubed and cold
  • 1 tsp salt, 1 tsp sugar
  • 6–8 tbsp ice water

👩‍🍳 Instructions:

  1. Make pie dough and chill for 1 hour.
  2. Mix filling ingredients and set aside.
  3. Roll out dough, fit into pie pan, add filling, dot with butter.
  4. Add top crust (lattice, full, or rustic), brush with egg wash.
  5. Bake at 400°F for 20 min, then 350°F for 35–40 min.
  6. Cool for 2 hours before serving.

📦 Storage Tips:

  • Keep covered at room temp for 2 days.
  • Refrigerate up to 5 days, or freeze slices.

✨ Notes:

  • Drain frozen berries before using.
  • Don’t skip cooling—it sets the filling.
  • Try brown sugar or almond extract for variation.

Let’s be real for a sec—sometimes you just want a solid, no-fuss dinner that doesn’t involve 47 ingredients and an advanced degree in culinary arts. That’s exactly why I swear by this oven baked chicken legs recipe. It’s simple, reliable, and makes you look like you know what you’re doing in the kitchen—even if you're winging it (pun intended).

Oven Baked Chicken Legs

I’ve made this recipe more times than I can count. Friends ask for it. Family expects it. My dog sits patiently at the oven door like it’s Christmas morning. So yeah, it’s that good.

Ready to make chicken that’s crispy on the outside, juicy on the inside, and full of flavor with practically zero effort? Let’s do this.

Why Oven Baked Chicken Legs Are the GOAT of Weeknight Dinners

Ever tried cooking something “easy” that somehow turned into a three-hour mess with 10 dirty dishes? Yeah, same. But chicken legs? Total lifesavers.

Here’s why they’re a weeknight MVP:

  • Cheap AF. Chicken legs are one of the most budget-friendly meats out there.
  • Full of flavor. Dark meat is where it’s at—juicy, tender, and totally forgiving if you slightly overcook it.
  • Minimal prep. Toss with seasoning, throw in the oven, done.
  • Crispy skin without deep frying. Yes, really. The oven can deliver that golden, crackly skin. You just need the right method (spoiler: I’ve got it).

So if you’re tired of dry chicken breasts or overly complicated recipes, this one’s gonna be your new bestie.

Ingredients You’ll Need

This isn’t one of those recipes where you need to forage for Himalayan spices or milk a yak. We’re keeping it basic and beautiful.

Here's what you need:

  • 6–8 chicken legs (drumsticks)
  • 2 tbsp olive oil
  • 1 tsp salt
  • 1/2 tsp black pepper
  • 1 tsp garlic powder
  • 1 tsp smoked paprika (trust me, this adds magic)
  • 1/2 tsp onion powder
  • Optional: pinch of cayenne if you like a little kick

Wanna upgrade it a bit?

You can mix things up with:

  • Italian seasoning
  • Lemon zest
  • Honey + mustard glaze (for a sticky finish)
  • Or even a spicy dry rub if you’re feeling bold

The point is—you can get fancy, but you really don’t need to.

The Foolproof Step-by-Step Method

Alright, here comes the gold. And no, it’s not rocket science. But technique matters, so pay attention 😉

Step 1: Preheat the Oven

Crank it up to 425°F (220°C). Yes, high heat. You want that skin to crisp up like a boss.

Step 2: Prep the Chicken

Pat the chicken legs dry with paper towels. Like, really dry.
Moisture is the enemy of crispiness, so get in there.

Then, toss the legs in a big bowl with olive oil and all your seasonings.
Coat them well—no naked spots allowed.

Step 3: Bake 'Em

Line a baking sheet with foil or parchment for easy cleanup (or don’t, and suffer later—your call 😬).
Place a wire rack on top of the sheet. Lay the chicken legs on the rack with a little space between each.

Why a rack? Because air circulation = crispy all over. Trust me, this little step changes the game.

Pop them in the oven for 35–40 minutes. Flip them halfway through if you’re feeling ambitious.
Internal temp should hit 165°F (74°C), but I usually let them go to 175°F–185°F for ultra-juiciness.

Tips for Next-Level Baked Chicken Legs

Want to impress someone? Or just flex a little at dinner? Here are a few tricks:

Let Them Rest

After baking, give your chicken legs 5–10 minutes to chill.
It helps the juices settle in and avoids that sad dry bite. Plus, you don’t burn your mouth in excitement.

Broil for Extra Crunch

If you’re a crunch monster like me, throw them under the broiler for 2–3 minutes at the end.
Keep a close eye though—this goes from golden to charred faster than your willpower on cheat day.

Marinade? Sure, if You’ve Got Time

If you want even more flavor, marinate the chicken overnight in a mix of olive oil, garlic, lemon juice, and herbs.
Not necessary, but hey, if you’re feeling fancy…

What to Serve With Oven Baked Chicken Legs?

Honestly, these legs go with almost anything. But if you’re looking for ideas, here are my go-to pairings:

Classic Sides:

  • Mashed potatoes (obviously)
  • Roasted veggies
  • Corn on the cob
  • Coleslaw (gives that sweet crunch contrast)

Low-Carb Mood?

  • Cauliflower mash
  • Zucchini fries
  • Avocado salad

Feeling Lazy?

No judgment. Grab some crusty bread and call it a night.
Or better yet—dip those legs in your favorite sauce and eat ‘em over the sink like a true kitchen rebel 😅

Common Mistakes to Avoid (Learn From My Pain)

Look, I’ve made every chicken leg mistake under the sun. Let me save you some heartbreak:

  • Don’t skip drying the skin. Crispy skin is born in that paper towel moment.
  • Don’t overcrowd the pan. They need space to roast, not steam.
  • Don’t under-season. Chicken legs can handle bold flavor. Bland = boring.
  • Don’t trust your oven blindly. Use a meat thermometer. Every oven lies. 🤷‍♀️

Got Leftovers? Lucky You.

These legs reheat beautifully. IMO, they might be even better the next day.
Here’s how to keep the magic alive:

  • Reheat in the oven at 375°F for 10–15 minutes to keep the skin crispy.
  • Avoid microwaving unless you're okay with floppy sadness.
  • Or, shred the meat and toss it into salads, wraps, or tacos.

FYI: They also freeze like a dream. Just wrap them tight and they’ll be good for a few months. Perfect for when future-you needs a win.

Final Thoughts: Is This the Best Oven Baked Chicken Legs Recipe? Heck Yes.

Look, I’m not saying this is the only way to bake chicken legs—but it’s definitely one of the best ways I’ve tried. It’s quick, it’s easy, and it delivers every single time.

The real beauty? You can tweak it to your heart’s content. Want them spicy? Go for it. Craving sweet and sticky? Slather on some honey BBQ sauce. Need it Whole30 or keto? Just ditch the sugary glazes and boom—you’re set.

So next time you’re staring into your fridge at 5:37 p.m. wondering what to make for dinner, remember this:
Chicken legs. Oven. 40 minutes. Crispy happiness.

And hey—once you try it, drop a comment or DM. Let me know if your family fought over the last drumstick too 😉

P.S. Ever baked your chicken legs with a drizzle of hot honey? You’re welcome in advance.

KFC Style Fried Chicken
KFC-Style Fried Chicken
By BitesWithFamily
Crispy, juicy, and seasoned to perfection! This homemade KFC-style fried chicken is marinated in buttermilk and coated in a flavorful spiced crust. It’s the ultimate comfort food.
Prep Time:
20 minutes + 4 hrs marinate
Cook Time:
15–18 minutes
Total Time:
4 hrs 40 minutes
Servings:
4–6 people

Ingredients

Instructions

  1. In a large bowl or zip bag, combine buttermilk and hot sauce. Add chicken, cover, and refrigerate for 4–12 hours.
  2. Remove chicken from the fridge 30 minutes before cooking to bring it to room temperature.
  3. In another bowl, mix flour, salt, paprika, garlic powder, onion powder, black pepper, and cayenne.
  4. Remove chicken from marinade, letting excess drip off. Dredge each piece in seasoned flour, pressing to coat.
  5. For extra crispy crust: Dip chicken back into buttermilk, then re-coat in flour mix.
  6. Heat oil in a deep fryer or heavy pan to 325°F (163°C).
  7. Fry chicken in batches (don’t overcrowd) for 15–18 minutes until golden brown and internal temp hits 165°F (74°C).
  8. Drain on a wire rack over a baking sheet (not paper towels, or it gets soggy).
  9. Let rest 5 minutes, then serve with your favorite dipping sauces!

Notes

* Use a meat thermometer for best results—165°F is the magic number.
* Double-coating gives you that classic KFC crunch.
* Letting the chicken rest after frying keeps juices sealed in.
* Try air-frying leftovers to keep them crisp!
* Want spicy chicken? Add more cayenne to the flour mix.

Nutrition

Serving: 2 pieces | Calories: 510kcal | Carbohydrates: 14g | Protein: 32g | Fat: 36g | Saturated Fat: 6g | Cholesterol: 115mg | Sodium: 760mg | Potassium: 460mg | Fiber: 1g | Sugar: 2g | Calcium: 80mg | Iron: 2.5mg
Nutritional information is approximate and varies based on ingredients and preparation. Always check your labels and tools for precision.

Carrot Banana Bread Recipe

Alright, confession time. I used to think carrot cake and banana bread should stay in their lanes. Like, why mess with two classics, right? But then one cozy Sunday, armed with a bunch of sad, overripe bananas and a half-bag of forgotten shredded carrots, I thought—why not throw them together and see what happens?

Spoiler alert: what happened was magic. Warm, moist, slightly spiced magic. This Carrot Banana Bread recipe is not just a happy accident—it's now my go-to loaf for everything from lazy brunches to guilt-free midnight snacks.

Carrot Banana Bread

So if you’ve ever stared down a bunch of speckled bananas or wondered what to do with that last carrot before it shrivels into a raisin—this one’s for you.

Why Carrot Banana Bread Deserves a Spot in Your Baking Rotation?

Let’s get this straight: this is not your average banana bread. Nope. This baby is like banana bread leveled-up—with extra flavor, extra texture, and just the right touch of spice.

What Makes This Combo So Genius?

  • Bananas bring the sweetness and that iconic, moist crumb.
  • Carrots add texture, color, and a sneaky veggie moment (we love a health-ish treat).
  • Warm spices (looking at you, cinnamon and nutmeg) add depth without overpowering the banana-y goodness.
  • Oh, and did I mention it makes your kitchen smell like a hug?

Seriously, if banana bread and carrot cake had a baby, it would be this loaf. And I’d be the proud godparent.

Required Ingredients

Ever read a recipe and immediately noped out because it asked for, like, monk fruit syrup or oat flour ground under a full moon? Same. This one’s chill, I swear.

Dry Ingredients

  • 1 ½ cups all-purpose flour
  • 1 tsp baking soda
  • ½ tsp baking powder
  • ½ tsp salt
  • 1 tsp ground cinnamon
  • ¼ tsp ground nutmeg (optional, but highly recommended)

Wet Ingredients

  • 2–3 ripe bananas (about 1 cup mashed)
  • 1 cup grated carrots (about 2 medium carrots)
  • ½ cup brown sugar (light or dark, both work)
  • ¼ cup white sugar
  • 2 large eggs
  • ⅓ cup oil (I use canola, but melted coconut oil is also 💯)
  • 1 tsp vanilla extract

Delicious Add-Ins(Optional)

  • ½ cup chopped walnuts or pecans
  • ½ cup raisins (don’t @ me, raisin haters)
  • ¼ cup shredded coconut for a tropical vibe

How to Make It?

Even if you burn toast on the regular, you can pull this off. I pinky swear.

Step-by-Step Breakdown

  1. Preheat that oven to 350°F (175°C) and grease a 9x5-inch loaf pan. Or use parchment paper if you’re feeling fancy.
  2. Mix the dry stuff in a bowl—flour, baking soda, baking powder, salt, cinnamon, nutmeg. Stir like a pro. Set it aside.
  3. Mash those bananas in another big bowl. Add in the sugar, eggs, oil, and vanilla. Stir until it’s smooth-ish. Lumps are fine. We’re not striving for Michelin stars here.
  4. Grate your carrots. No, don’t skip this. Pre-grated carrots from a bag don’t release the moisture you need.
  5. Combine wet and dry—dump the flour mix into the banana mix and stir until just combined. Overmixing = sad, tough bread.
  6. Fold in the carrots and any optional goodies (nuts, raisins, coconut—live your best life).
  7. Pour into the pan, smooth the top, and bake for 50–60 minutes. Start checking around 50. A toothpick should come out clean or with a few moist crumbs (not batter!).
  8. Cool it down for at least 15 minutes before slicing. If you don’t wait, you’re just asking for a crumbly mess. Trust me.

Pro Tips You’ll Thank Me For Later

Sure, the basic recipe works great—but these tweaks can take your loaf from “yum” to “why did I eat three slices in one sitting?”

Don’t Overmix

Like, seriously. Stir just until you don’t see flour anymore. Overmixing develops gluten, and unless you’re baking bread that needs kneading, gluten is not your friend here.

Use Very Ripe Bananas

The more brown spots, the better. If they look too gross to eat, they’re perfect for baking. Ever freeze bananas and then forget about them for six months? Perfect.

Shred the Carrots Finely

You want them to melt into the bread, not turn it into a salad. Use the fine side of your box grater.

Toast the Nuts

If you’re adding nuts, give them a quick toast in a dry pan. It adds so much flavor you’ll wonder why you didn’t start doing it sooner.

Variations to Keep Things Interesting

Let’s be real—once you’ve made this bread once, you’ll want to make it again. So here’s how to keep it spicy (literally and metaphorically).

Tropical Vibes

Swap half the bananas for crushed pineapple (drained), and toss in shredded coconut. You’ll feel like you’re on vacation. Kind of.

Morning Muffins

Pour the batter into a muffin tin and bake at 350°F for 20–25 mins. Boom—grab-and-go breakfasts that don’t come out of a wrapper.

Cream Cheese Swirl

Want to get extra? Mix 4 oz cream cheese, 1 egg yolk, and 2 tbsp sugar. Dollop and swirl it into the top of the batter before baking. Prepare to impress everyone. Including yourself.

Storage & Freezing (AKA How to Make It Last... If You Don’t Eat It All Immediately)

I know, leftovers are rare, but just in case:

  • Room Temp: Store in an airtight container for up to 4 days.
  • Fridge: Keeps for a week, but wrap it well to avoid the dreaded fridge dryness.
  • Freezer: Wrap slices individually in plastic wrap and pop them in a freezer bag. Reheat in the microwave for 30–45 seconds. You’ll thank me on a busy Monday morning. :)

Is This Bread Healthy?

Well... define “healthy.” It’s got bananas. And carrots. So we’re basically looking at a vegetable loaf, right?

Kidding aside, this loaf uses minimal oil, has real fruit and veggies, and can easily be tweaked. Want to cut back on sugar? Use applesauce. Want it gluten-free? Swap the flour for a 1:1 GF blend. It’s flexible. Like, yoga-flexible.

Why This Recipe Works (The Science-y Stuff, But Make It Fun)

Ever wondered why this combo works so well? Here’s the quick-and-dirty:

  • Bananas add moisture, natural sweetness, and binding power (like eggs, but plant-y).
  • Carrots contribute moisture and structure. Plus, beta-carotene = you’re basically glowing from the inside out.
  • Spices like cinnamon and nutmeg add that warm, nostalgic flavor that makes you feel like someone just gave you a cozy blanket.
  • Oil instead of butter keeps things soft for days. Butter adds flavor, but IMO, oil gives better texture for quick breads.

Final Thoughts: Make the Bread Already!

So there you have it. My beloved Carrot Banana Bread recipe, straight from my cluttered kitchen to yours. It’s easy, it’s tasty, and it might just become your new favorite way to rescue those squishy bananas you keep pretending you’ll use “tomorrow.”

Try it once, and I dare you not to become obsessed. Share it with friends, hoard it for yourself—zero judgment either way. Just don’t forget to snap a pic before you inhale the whole loaf. FYI: it looks great with a little cream cheese smeared on top. 😋

Go preheat that oven. You’ve got some bread to bake.

The Best Raspberry Bread
By Averie Sunshine
There's almost more raspberries than bread in my recipe for the BEST RASPBERRY BREAD!! You'll want to make it over and over because it's super soft and just bursting with juicy berries!!
Prep Time:
10 minutes
Cook Time:
20 minutes
Total Time:
30 minutes
Servings:
4 people
Raspberry Bread

Samoa Cheesecake Recipe

Alright, let’s be real. If you’ve ever tasted a Samoa Girl Scout cookie and thought, “You know what would make this better? Turning it into an entire cheesecake,” you are my kind of person. You’re not alone either—this Samoa Cheesecake recipe is one of those “where-have-you-been-all-my-life?” kind of desserts. And lucky for you, it’s not just drool-worthy... it’s totally doable at home.

Samoa Cheesecake

So buckle up, dessert lovers. Whether you're baking to impress or just feeding your inner sugar goblin, this Samoa-inspired cheesecake will steal the show—and maybe even your soul. Let’s talk about how to build this caramel-coconut-chocolate masterpiece from the crust up. 🍰

What the Heck is a Samoa Cheesecake, Anyway?

Let’s break it down. Imagine a creamy, rich cheesecake hanging out with a box of Samoa cookies for too long and thinking, “Hey, I could totally be that.” The result? Pure magic.

Here’s What Makes It a Samoa Cheesecake:

  • Graham cracker crust (with a little chocolate if you're feeling fancy)
  • Classic vanilla cheesecake filling
  • Toasted coconut caramel topping
  • A generous drizzle of melted chocolate
  • Optional: more Samoa cookies on top because why the heck not?

Seriously, it’s like a cheesecake decided to cosplay as a cookie. And we are here for it.

Ingredients You’ll Need (No Weird Stuff, Promise)

Before we get into the step-by-step action, here’s your grocery game plan. I promise—no unicorn dust or secret ingredients. Just honest-to-goodness pantry stuff.

Crust:

  • 1 ½ cups graham cracker crumbs
  • ¼ cup sugar
  • ½ cup melted butter
  • Optional: ¼ cup chocolate chips (for bonus flavor points)

Cheesecake Filling:

  • 3 (8 oz) blocks of cream cheese, softened
  • 1 cup granulated sugar
  • 1 tsp vanilla extract
  • 3 large eggs
  • 1 cup sour cream

Topping:

  • 1 ½ cups shredded coconut, toasted
  • 1 cup caramel sauce (store-bought or homemade, if you’re feeling extra)
  • ½ cup semi-sweet chocolate chips, melted
  • Optional: Samoa cookies, chopped or halved for decoration

FYI: If you're already panicking at the thought of making caramel from scratch—relax. I grab the jarred stuff from Trader Joe’s and call it a day. No shame. 🙃

How to Make Samoa Cheesecake

This part might sound intimidating if you're not a “baker” (whatever that means), but trust me—you can totally pull this off. I’ve made this recipe more times than I care to admit, and even my oven-averse friends have nailed it.

Step 1: Make That Crust

  • Preheat your oven to 325°F (because cold cheesecake = crime).
  • Mix the graham cracker crumbs, sugar, and melted butter until it looks like wet sand. Not the gross beach kind—the edible, buttery kind.
  • Press that into a 9-inch springform pan. Use the bottom of a measuring cup to smush it evenly.
  • Bake it for about 8-10 minutes, then let it cool.

Step 2: Get Creamy With the Cheesecake Layer

  • Beat the cream cheese and sugar together until smooth. Like, no lumps. This step is not the time to slack off.
  • Add vanilla and the eggs one at a time, beating in between.
  • Fold in the sour cream until the batter is silky and gorgeous. (Pro tip: Don't overmix or you’ll get cracks. Sad times.)
  • Pour that creamy goodness onto your cooled crust and give it a gentle shake to even things out.

Step 3: Bake the Cheesecake

  • Bake for 50–60 minutes, or until the center is slightly jiggly. Yes, I said jiggly—not liquid.
  • Turn the oven off, crack the door, and let it sit inside for about 30 minutes. This helps avoid that heartbreaking top crack.
  • Let it cool fully, then chill it in the fridge for at least 4 hours—overnight if you can resist.

Step 4: Add That Samoa Magic

  • Toast the shredded coconut in a dry skillet over medium heat. Stir constantly and watch it like a hawk—it burns faster than your ex’s excuses.
  • Mix the toasted coconut with the caramel sauce and spread it lovingly over your chilled cheesecake.
  • Melt your chocolate chips and drizzle it all over the top. Go Jackson Pollock with it.
  • Add chopped Samoa cookies if you’re feeling a little extra (you are, and you should).

Boom. Your Samoa Cheesecake is ready to blow minds.

Can I Make This Ahead of Time?

Absolutely. In fact, it’s better if you do. Cheesecake needs chill time anyway (don’t we all?), and the flavors get richer after a day in the fridge.

  • Make the cheesecake 1–2 days ahead.
  • Add the topping the day of serving so it stays fresh and fab.

Tips So You Don’t Ruin It (I Got You)

I’ve messed up enough cheesecakes so you don’t have to. Here are a few things I wish someone had told me sooner:

✅ DO:

  • Use room temp ingredients. Cold cream cheese = lumpy disaster.
  • Line the bottom of your pan with parchment for easier cleanup.
  • Bake with a water bath if you’re extra paranoid about cracks (I skip it most of the time, TBH).

❌ DON’T:

  • Overmix the batter. Air = cracks.
  • Open the oven door mid-bake just because you’re curious. (Control yourself.)
  • Add toppings before the cheesecake is chilled. Melted mess = not the vibe.

Wanna Take It Up a Notch?

If you’re like me and can’t stop won’t stop, here are a few fun ways to remix your Samoa cheesecake:

  • Add a brownie layer beneath the crust for a Samoa-Brownie hybrid. Yes, I’m serious.
  • Use dulce de leche instead of caramel. More depth, more drama, more yum.
  • Make minis using a muffin tin for easy party servings (or portion control...lol, as if).

So... Is Samoa Cheesecake Worth the Hype?

Let me put it this way: if a cheesecake and a cookie had a baby, and that baby grew up to be a total rockstar, it’d be this recipe.

It’s rich. It’s nostalgic. It’s indulgent without being cloying. And IMO, it’s the kind of dessert that makes people say, “Wait, you made this?!”

Yes. You. Made. This.

Final Thoughts

So there you have it—my tried-and-true, Samoa Cheesecake recipe that’ll make you the MVP of any party, potluck, or random Tuesday night when you just need something sweet to look forward to.

This isn't just dessert. This is a love letter to your taste buds. A declaration of sweet, caramel-filled victory. So grab your ingredients, put on your coziest playlist, and get baking.

And hey—don’t forget to stash a slice for yourself before your friends devour it. You’ll thank me later. 😉

P.S. If you do end up making it, tag me in a pic or drop a comment with how it turned out! I love seeing fellow dessert nerds win. 🧁

Samoa Cheesecake Recipe

⏱️ Prep Time: 25 min
🔥 Cook Time: 1 hr
🍽️ Serves: 10–12
⏰ Chill Time: 4–8 hrs
🔥 Total Time: 6–9 hrs

🥘 Ingredients:

  • 1 ½ cups graham cracker crumbs
  • ¼ cup sugar
  • ½ cup melted butter
  • Optional: ¼ cup chocolate chips
  • 3 (8 oz) blocks cream cheese, softened
  • 1 cup granulated sugar
  • 1 tsp vanilla extract
  • 3 large eggs
  • 1 cup sour cream
  • 1 ½ cups shredded coconut, toasted
  • 1 cup caramel sauce
  • ½ cup semi-sweet chocolate chips, melted
  • Optional: Samoa cookies for garnish

👩‍🍳 Instructions:

  1. Preheat oven to 325°F. Mix crust ingredients and press into pan. Bake 8–10 min.
  2. Beat cream cheese and sugar until smooth. Add vanilla, eggs (one at a time), then fold in sour cream.
  3. Pour filling over crust. Bake 50–60 min. Let rest in oven 30 min, then chill 4+ hrs.
  4. Toast coconut. Mix with caramel and spread over cheesecake.
  5. Drizzle melted chocolate on top and garnish with Samoa cookies.

Sweet Corn Salad Recipe: The Only Summer Side You’ll Ever Need 

Let’s be real for a second—summer eating gets repetitive fast. Burgers, hot dogs, the occasional potato salad that tastes like it came straight out of a sad deli container. But what if I told you there’s a side dish that’s fresh, flavorful, ridiculously easy to make, and gets devoured faster than you can say, “Who brought the boring coleslaw?” Yep, I’m talking about sweet corn salad.

Sweet Corn Salad

This isn’t just any sweet corn salad. This is the sweet corn salad. The one that gets you recipe requests from people who usually “don’t do salads.” It's crunchy, zesty, a little creamy, and it basically tastes like summer in a bowl. And bonus: it doesn’t require any cooking if you use canned or frozen corn (but more on that in a bit 😉).

So, grab a bowl and let’s do this!

Why You Need To Try This Sweet Corn Salad?

Ever tried a side dish so good you planned your meal around it? That’s what we’re dealing with here.

This salad is the ultimate combo of:

  • Sweet corn (obviously)
  • Crunchy fresh veggies
  • Creamy dressing with a tangy kick
  • Zingy herbs that make it taste like you’ve got a green thumb (even if your plants keep dying on you—no judgment)

It works as a side, sure. But it also doubles as a topping for tacos, a filling for lettuce wraps, or heck, just something you eat straight out of the bowl with a spoon at 11 p.m. (No shame. We’ve all been there.)

Ingredients You’ll Need (And a Few You’ll Want to Add)

Let’s start with the basics. This is a flexible recipe—AKA, you can mess around with it and still end up with something amazing.

🛒 Base Ingredients (the must-haves):

  • 3 cups sweet corn (fresh, frozen, or canned — more on that below)
  • 1/2 red onion, finely chopped
  • 1 bell pepper, diced (go red, yellow, or orange for sweetness)
  • 1/4 cup fresh cilantro, chopped
  • Juice of 1 lime
  • 1/2 cup crumbled feta or cotija cheese
  • 2–3 tbsp mayonnaise or Greek yogurt
  • Salt and pepper, to taste

🧑‍🍳 Optional Add-ins (because you’re fancy):

  • Jalapeño for a spicy kick 🔥
  • Cherry tomatoes, halved
  • Avocado, diced (but add right before serving so it doesn’t go mush-city)
  • Cucumber, chopped for extra crunch
  • Green onions, because more onion = more party

Fresh, Frozen, or Canned Corn? Let’s Settle This

Alright, the million-dollar question: What kind of corn should you use?

Here’s the breakdown:

  • Fresh corn: Grill it, boil it, or just slice it off the cob raw (yes, raw corn is amazing in salads—don’t knock it). It has the most flavor if you’ve got the time.
  • Frozen corn: The MVP of lazy cooking. Just thaw and boom—you’re golden.
  • Canned corn: Totally fine. Just rinse and drain it well so your salad doesn’t taste like...well, can.

IMO, frozen wins for the convenience-to-flavor ratio. But if it’s peak corn season and you can get your hands on fresh ears? Do it. Your tastebuds will throw a mini party.

How to Make It (Spoiler: It’s Almost Too Easy)

Ready for the instructions? Get this—it’s basically three steps. Yep, three. Told you this salad was magical.

Step-by-step:

  1. Prep your ingredients – Chop everything up. If you’re using fresh corn, slice it off the cob. If it’s frozen, thaw it. Canned? Drain and rinse, baby.
  2. Mix it all together – Toss corn, onion, bell pepper, cheese, cilantro, and any extras you want in a big ol’ bowl.
  3. Add the dressing – Squeeze in the lime juice, stir in mayo or Greek yogurt, and season with salt and pepper. Give it a taste and adjust if needed.

That’s it. Seriously.

FYI: It tastes even better after chilling in the fridge for 30 minutes, but if you don’t have that kind of patience (same), it’s still amazing right away.

Sweet Corn Salad Hacks (Because We’re All About That Efficiency)

Let me drop some life-changing salad tips:

  • Want it vegan? Skip the cheese and use vegan mayo or just olive oil and lime. Still delish.
  • Need to prep ahead? Mix everything except the dressing and herbs. Add those right before serving so it stays fresh and vibrant.
  • Looking for a main dish twist? Toss in grilled chicken, shrimp, or black beans. Bam—dinner.

And here's a wild one: ever tried mixing in a spoonful of chipotle mayo or sriracha for heat? Holy flavor bomb. Just saying.

The Flavor Profile Breakdown (So You Know Why It Works)

Ever wondered why this salad just hits different? It’s all about the contrast.

Here’s what’s going on:

  • Sweet + salty: Corn and feta/cotija? Perfect balance.
  • Crunchy + creamy: Crisp veggies and smooth dressing = mouth heaven.
  • Fresh + tangy: Lime juice and herbs lift everything up.

Honestly, it’s science. Delicious, snackable science.

What to Serve With Sweet Corn Salad (Or Just Eat It Alone—No Judgments)

This salad plays well with just about anything, but here are some next-level pairings:

  • BBQ anything – Ribs, pulled pork, grilled chicken. It cuts the richness like a boss.
  • Tacos – Especially fish or shrimp tacos. Oof.
  • Grilled veggies – Zucchini, eggplant, asparagus—you name it.
  • Burgers – Because you deserve more than sad chips on the side.

Or go rogue and eat it with tortilla chips. Like a dip. Trust me on this one.

Let’s Talk Leftovers (If You Somehow Have Any)

Okay, first off—good luck having leftovers. People demolish this salad.

But in the rare case you’ve got some left:

  • Store it in an airtight container in the fridge.
  • Eat it within 2–3 days for best flavor.
  • Stir before serving—especially if you added avocado or creamy dressing.

Pro tip: If it gets a little watery, just add a tiny splash of lime juice and a pinch of salt to perk it back up. Works like a charm.

Final Thoughts

Look, not every side dish earns a standing ovation. But this sweet corn salad? Yeah, it deserves its own round of applause.

It’s fast. It’s fresh. It’s foolproof. You don’t need fancy ingredients or chef-level skills—just a knife, a bowl, and maybe 15 minutes. And let’s be real: anything that makes you look like a kitchen genius with minimal effort is a win.

So next time someone asks what you’re bringing to the cookout, you know what to do.

Make the salad. Be the hero. Get all the compliments.

Now go grab some corn and get mixing! And hey, if you end up adding something wild to yours (like bacon or mango 👀), let me know—I’m always down to level-up the flavor game.

Happy salad-ing! 😎🌽

Sweet Corn Salad

⏱️ Prep Time: 15 min
🔥 Cook Time: 0 min
🍽️ Serves: 4–6
⏰ Total Time: 15 min
🔥 Calories: ~250 (depends on toppings)

🥘 Ingredients:

  • 3 cups sweet corn (fresh, frozen, or canned)
  • 1/2 red onion, finely chopped
  • 1 bell pepper, diced
  • 1/4 cup fresh cilantro, chopped
  • Juice of 1 lime
  • 1/2 cup crumbled feta or cotija cheese
  • 2–3 tbsp mayonnaise or Greek yogurt
  • Salt and pepper, to taste

👩‍🍳 Instructions:

  1. Prep your ingredients: chop veggies, thaw or drain corn as needed.
  2. Combine corn, onion, pepper, cheese, and cilantro in a large bowl.
  3. Mix in lime juice and mayo or yogurt. Season with salt and pepper.
  4. Stir well and chill for 30 minutes if you’ve got time. Serve and enjoy!

📦 Storage Tips:

  • Store in an airtight container in the fridge for up to 3 days.
  • Stir before serving. Add lime and salt if it gets watery.

✨ Notes:

  • Add-ins like avocado, jalapeño, or cherry tomatoes are amazing.
  • Serve as a side, taco topping, or eat it with tortilla chips.
Older Posts Home

ABOUT ME

Food stylist & photographer. Loves nature and healthy food, and good coffee. Don't hesitate to come for say a small "hello!"
Never Miss A Recipe!

Join thousands of our subscribers and get our best recipes delivered each week!

SUBSCRIBE & FOLLOW

Advertisement


The Blog


Pages

  • Home
  • Privacy Policy
  • Terms Of Service
  • Disclosure Policy
  • Contact Us
  • About Me

Categories

  • APPETIZERS
  • BREAD
  • BREAKFAST
  • CHICKEN
  • DESSERTS
  • MAIN DISHES
  • PASTA
  • SOUP

Copyright © Pepper Theme. Designed by OddThemes

Copyright © Broma Bakery. All Rights Reserved.